You want to give your bride – or yourself – a royal JGA? With our instructions you can easily make a crown for the JGA. To find out how, just read on!
If you’d prefer to make a belly store, feel free to check out our tutorial.
Materials
- Scissors & Stanley knife
- thin cardboard / thick paper in the right color
- Decoration (glitter, eddings, etc.)
- Pencil
- Ruler
- Fabric rubber band
Step 1 – Crafting crown: all beginning is…simple
First, cut your cardstock to the right size. You need a rectangle with a side length of 20×9,5cm.
This turns into quite a small crown, so if you prefer something wider, you should work with more length but a little less height.

Step 2 – Unflatten the Curve
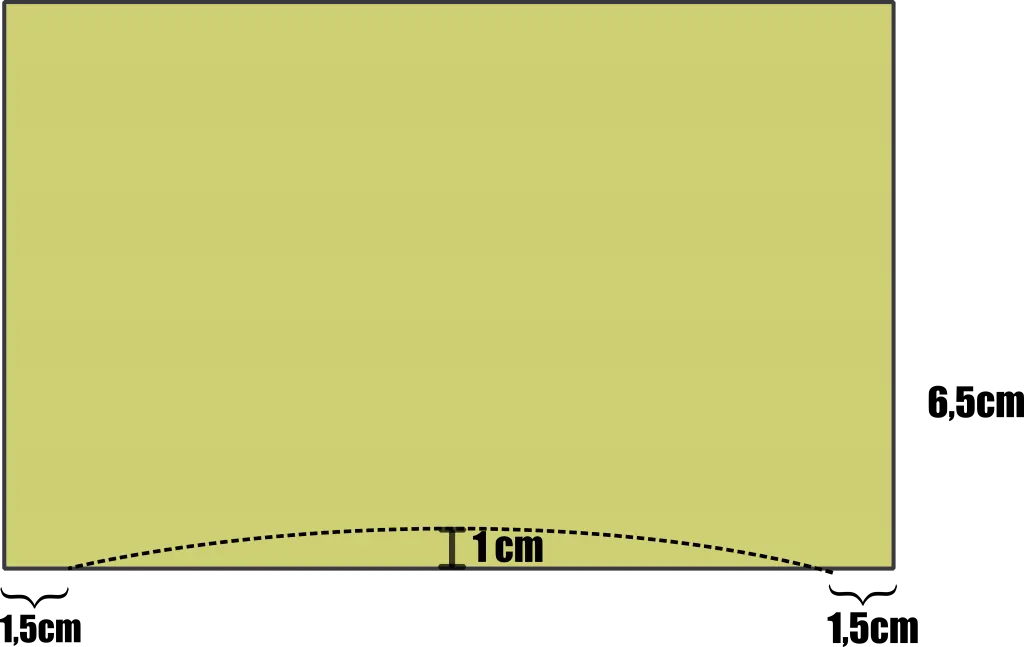
Now measure 1.5cm at the bottom edges and mark the points with a pencil. In the middle of the lower line (in the picture at the 1cm mark) make another point.
Then draw an arc as in the picture and cut it out.
Step 3 – Measurements
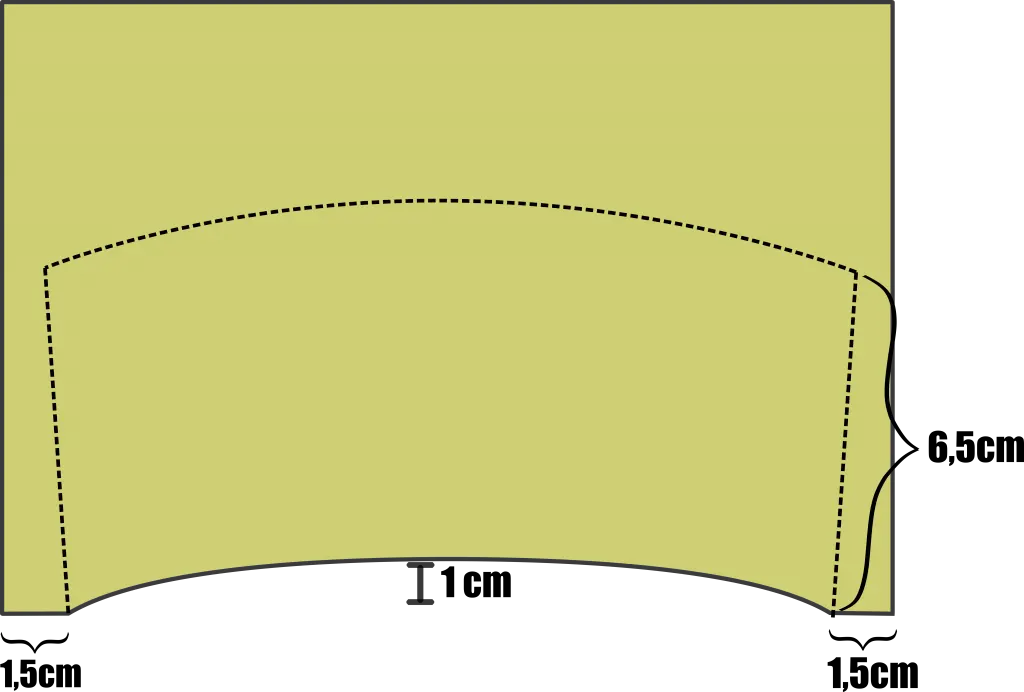
Your crown should be about 6.5cm high. Draw two diagonal lines from the corners of your bottom arc upwards – it is important to leave a little space on both sides. There, the tabs for plugging together are drawn in at once.
Then draw another arc as in the picture.
Step 4 – Crown crafting made easy: tabs and slots
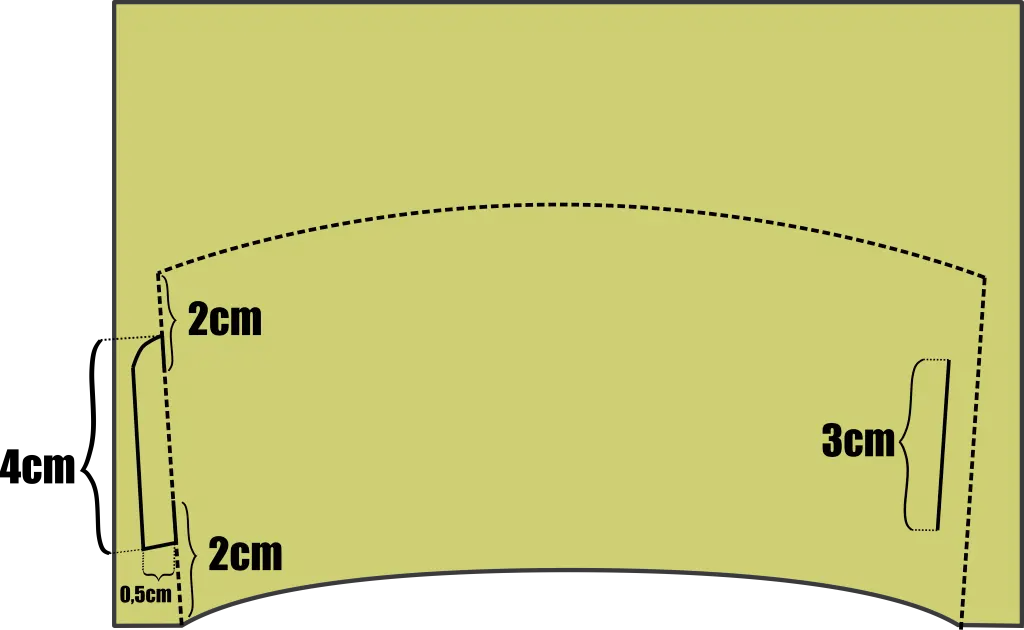
Now draw a tab on the left as in the illustration. Pay close attention to the dimensions, because the whole thing should fit together in the end.
On the right, you need to draw a 3cm line parallel to your outer edge – if you want, you can make a cut right away with the Stanley knife. This is where your tab will be inserted later.
Step 5 – don’t break any loggerheads
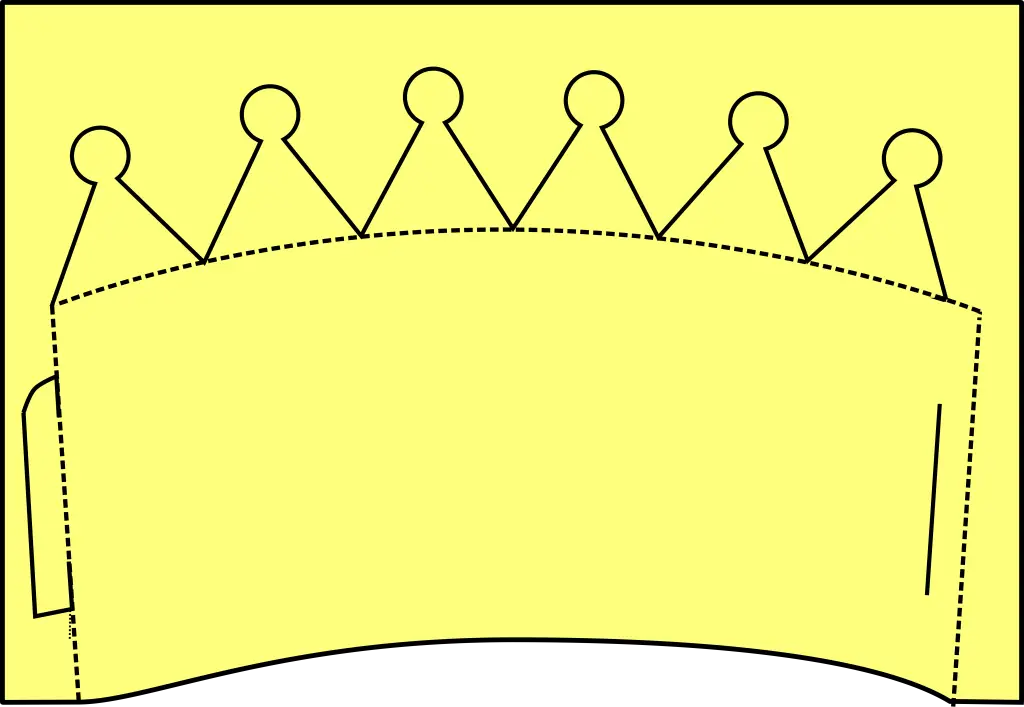
Now draw your prongs along your pencil line at the top.
Step 6

Now it’s time to start cutting. For the flap on the left, you’ll need to cut in a bit – about 2cm from the top and bottom edges is ideal.
Those who have not yet done so should now make their tuck-in cut on the right.
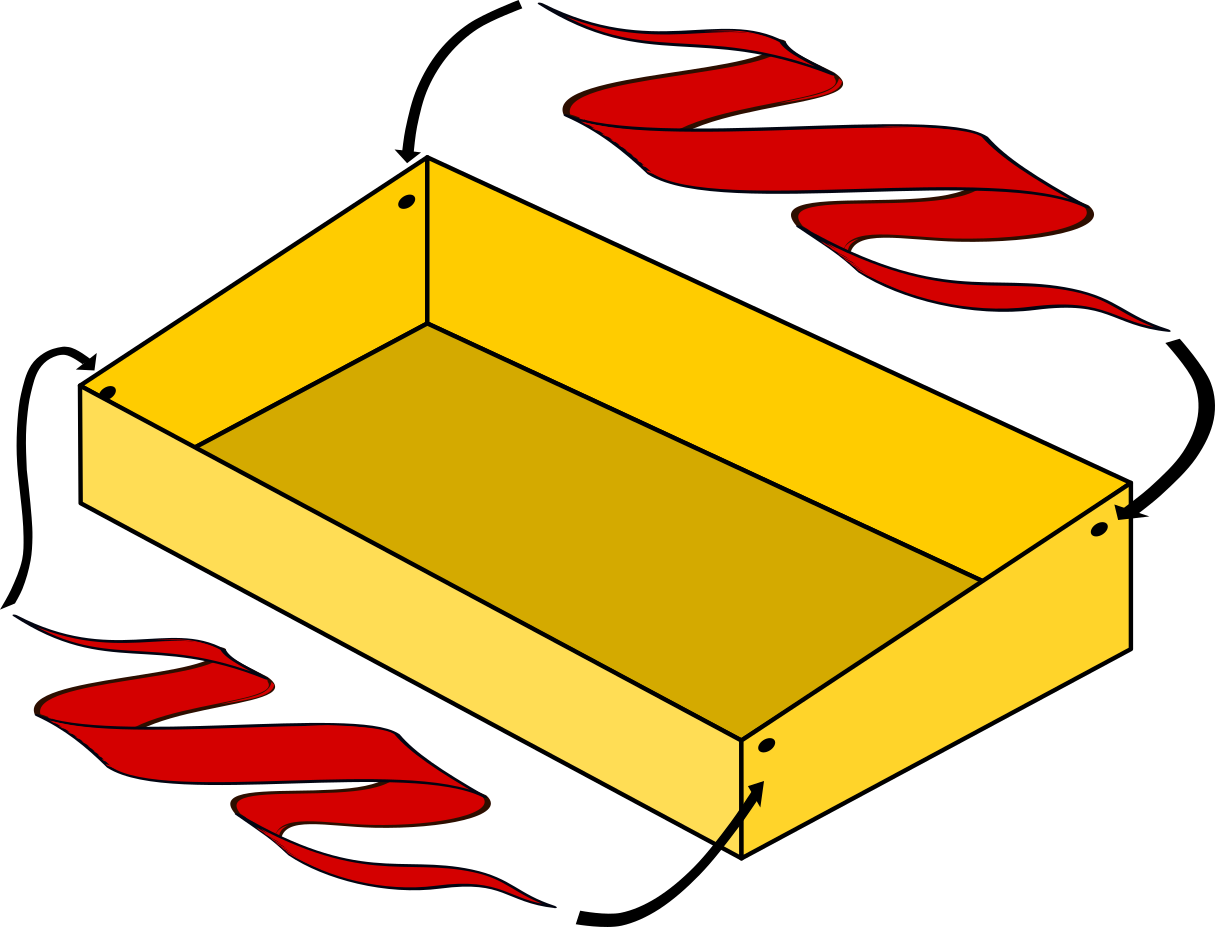
Also poke small holes in your crown for the elastic as shown in the illustration.
Crafting crown for JGA – Step 7 – Decorate
And now you can start decorating. Whether “Team Bride” or “JGA 21”, what is written on the crown, you alone decide. Add a little decoration all around, tuck the tab into the slit, tie the elastic and your JGA crown is ready!
If that’s too much work for you, you can always just check out Amazon*.

*This article contains commission links.